How I made my own room box to photograph my miniature dolls in.

How I made my own room box to photograph my miniature dolls in.

It is always nice to photograph miniature dolls in some sort of room scene, but it’s not always possible to photograph them well in a real dollshouse. Often the light is difficult to get right and ceilings with light fittings get in the way of hands and cameras…… and especially as I am not the greatest when it comes to photography.


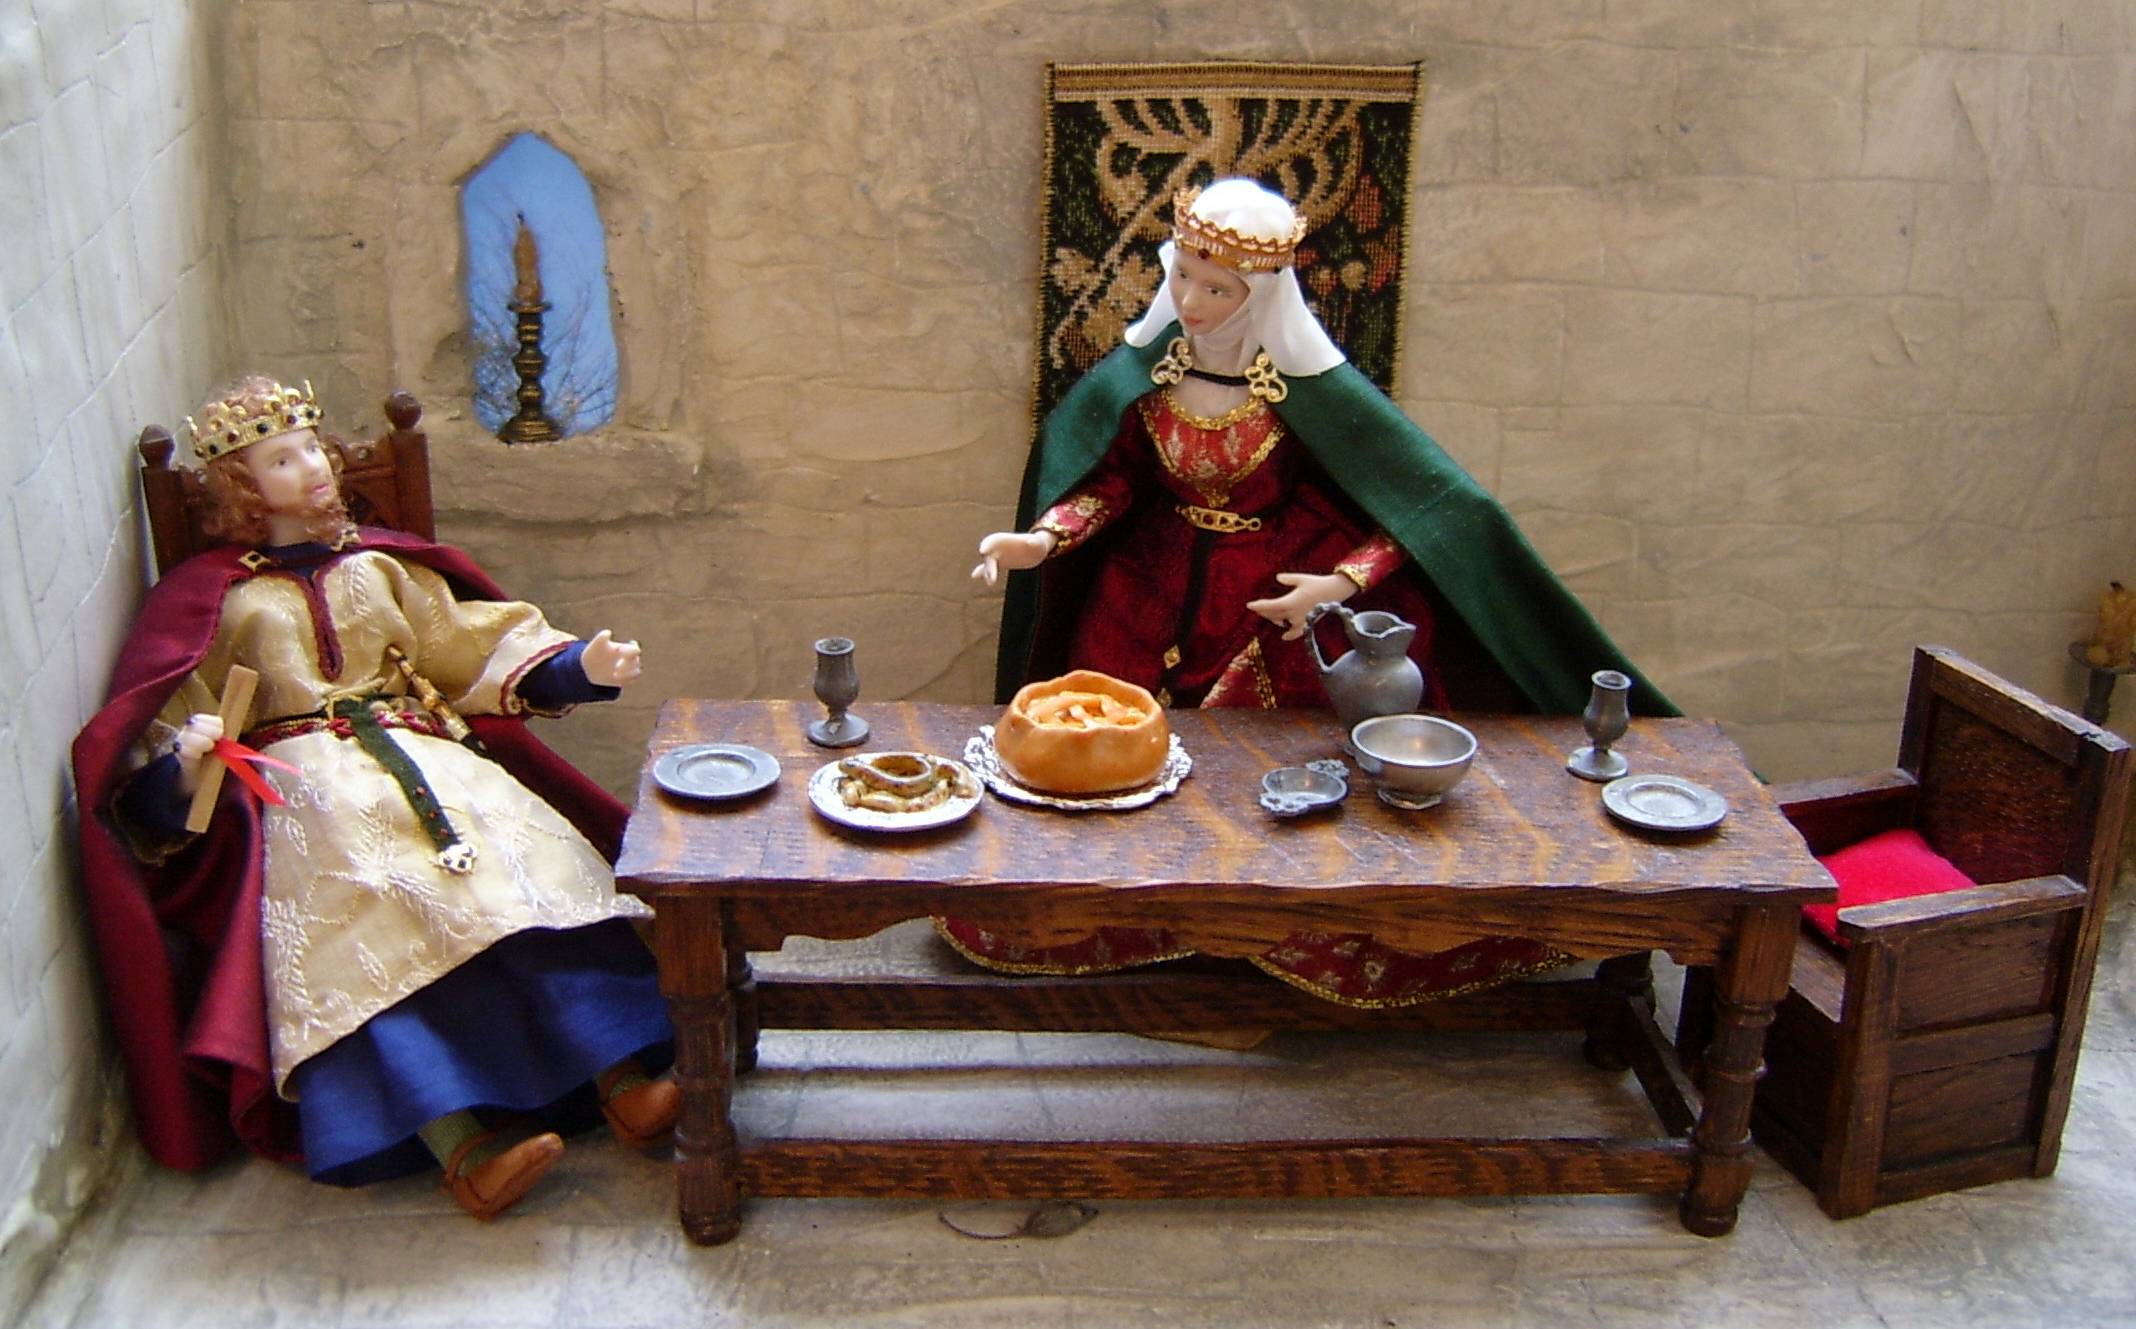
Many years ago, I was given a lovely room box by miniature metal work artist, Tony Knott. He had made it to display his pewter tableware and weaponry at miniatures fairs. I forgot I had it for a long time….until we cleared out our loft a few years ago. It is perfect for photographing the Medieval and Tudor dolls I make, as it has no ceiling and is open at the front, thus enabling good light. Here are a few examples of the many historical settings I have used it for.

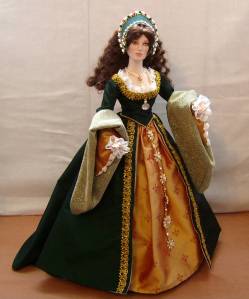
Anne Boleyn with Thomas Cranmer.


Miniature Elizabeth 1st doll complete in room setting.


Miniature King John and his wife Queen Isabella.


Miniature King Richard III with his wife Queen Anne Neville.


Dr Innes and Lady Caroline from Poldark.


Scrooge in his bed chamber.


But…..there is just one problem with this lovely room box…..it is not really suitable for anything later than about the 1700s…..unless I want all my dolls of later eras to be photographed as if they are in a church or visiting a castle.

So, I knew I needed a room box that could be used to photograph dolls from the Georgian era, right up to more modern times.

I decided I would try and make something myself as, buying these room boxes can work out very expensive…….and I did once successfully decorate a dollshouse back in the early 1990s.

My husband made the actual box shape for me from an off-cut of MDF from the local DIY store….but the rest was up to me……and suddenly, the early 1990s seemed rather a long time ago!


I am not really that great when it comes to making things involving wood….I’m far more comfortable with fabric. So, I felt that breaking the task down into achievable sections was probably the best way to proceed….along with plenty of pep-talks along the way.

I had a quick look in the dollshouse I’d decorated in the 90s and it really wasn’t that bad. There were a few rough and ready bits here and there but over all, it was acceptable and any really rough bits were hidden with furniture and/or dolls (she smiles to hide embarrassment).

And, as I told myself during one of the many pep-talks (yes, this is what happens when you don’t get out much!), I was making it to photograph dolls in…..it was to be a setting….. a background for the dolls….nothing more.


So I began. First I prepared the three walls with a coat of white acrylic undercoat as the MDF was quite dark and I didn’t want it distorting the colour of the wallpaper I’d bought.

Painting the walls with white paint.


Then, I realised that I would need a chimney breast to sit the fireplace against…..but I didn’t panic because I knew I had done this all before in the dollshouse.

I bought some balsa wood, glued it together to make the right width (couldn’t find the right width anywhere in the shops for love nor money….always the way!). This I covered with plain white paper and glued into place on one of the walls with PVA glue……so far, so good.

Balsam covered with white paper.

Next came flooring and I decided to use the same method I remembered using with the dollshouse. This was a sheet of very thin real wood that looks like floor boards and can be easily cut to shape. I measured the length and width I needed and then cut out a small section for the fireplace that I had already purchased.

Bare flooring sheet cut to size.


Once cut out and checked for size, I was able to stain it with ordinary liquid wood stain and when this was dry, I was able to give it a coat of acrylic varnish.

The flooring stained.


The flooring varnished.

My next task was to paper the walls and, after reading an article on mini wallpapering in a miniatures magazine (great timing!) I made a start.

I was a bit nervous about this task……I am not the world’s best dollshouse wallpaperer………and I was a little worried at first because it looked a bit ‘bubbly’…despite manic brushing with a paintbrush……but once it had dried, it was fine…….huge sigh of relief!

The wallpaper on and dry.

Now the box was beginning to take shape as a room and, with the flooring glued in place, I was feeling a little more positive.

The flooring glued in place.


I then turned my attention to the lovely little dummy door I’d found on-line. I had wanted the illusion of a doorway at the end of the room and so was delighted to find this. All it required was painting and the door handle gluing in place.

The dummy door before painting.


Door painted and handle etc glued in place.


While I had the paint out, I painted the skirting boards and some picture rail. (I remembered that I’d found it better to paint the whole strip before cutting and fitting).

Skirting boards painted.

I have to admit at this point, that I did decide not to use the picture rail…partly because I realised (too late) that I hadn’t meant to paper all the way up the walls……and partly because by this point in the ‘adventure’, I would have lost the will to live if I’d had to remove all the paper and start again!

Another pep-talk reminded me that the whole thing was just to photograph dolls in……hopefully people would be too busy looking at my dolls and not the background decor! (You’ll all be having a closer look now, won’t you?!)

So, I reasoned with myself (most miniaturists talk to themselves…..it’s because we spend a lot of time on our own in a make-believe world!) I had come this far and so I must now therefore finish the task.

The dummy door and fireplace were glued into place and the room was now ready for the skirting board…….and the dreaded mini mitre box and saw (imagine scary music here).


I knew I had used the mitre box before when I did the skirting (and picture rails) in my dollshouse….and it is a lovely little mitre box, it really is…..made especially for cutting miniature things…..but it scared the hell out of me….as did the lovely little miniature saw (more scary music).


So I thought it best to have a bit of a practice first…..and thank God I did!!!


Eventually……and after much extremely bad language…. (I know….I don’t look the type, do I?) I got the hang of it again and was managing a half decent job.

I started by fitting the skirting to the back wall, then each side of the dummy door.

Door and skirting board glued into place.

Lastly I did the other wall and, working from the back, applied the skirting board around the fireplace.

The fire place and skirting has been glued into place.

I’m sure that a professional dollshouse maker would probably faint at my ‘workmanship’ but it serves my needs and made a fine enough background for the little ‘Terrible Twins’ when I photographed them getting up to mischief.

The Terrible Twins have crept into their Mama’s bedroom and are causing mayhem. Even Poppy the poodle is on the bed!


A close up of the mischief.


Now……where did I put that kit to make a little dollshouse/shop….. I’ve had it for about 25 years…….but perhaps I’ll leave tackling that for a while long…….well, it’s not going anywhere, is it?


And I’m not sure my nerves could quite stand any more dollhouse drama for a while!

ANGELIQUE MINIATURES CELEBRATES 28 YEARS TODAY!

STORE BANNER HORIZONTAL PNG


To celebrate this anniversary I thought I would share some pictures of my favourite doll projects from more recent years (since digital cameras and the internet!!!).

From fairies and fantasy to historical characters, I have thoroughly enjoyed each and every one of them. The planning, research and actual creating never fails to excite me and I look forward to each new project that comes my way, so please enjoy my selection:

Anne Boleyn costume for 16 inch fashion doll.

Anne Boleyn costume for 16 inch fashion doll.

Miniature Fairy riding a unicorn.

Miniature Fairy riding a unicorn.

 Princess Diana wedding gown on miniature mannequin.

Princess Diana wedding gown on miniature mannequin.

 Miniature late Victorian Summer Bride.

Miniature late Victorian Summer Bride.

Custom made Aurora Rose tutu for 16 inch ballerina doll.

Custom made Aurora Rose tutu for 16 inch ballerina doll.

Miniature Giselle or Sylphide tutu set.

Miniature Giselle or Sylphide tutu set.

Miniature Fairy Slippers (shown with an English penny and American five cent piece).

Miniature Fairy Slippers (shown with an English penny and American five cent piece).

Miniature Fairy Flower Seller with her unicorn companion and helper.

Miniature Fairy Flower Seller with her unicorn companion and helper.

Miniature Brown silk bonnet with shirred ivory silk lining and matching reticule.

Miniature Brown silk bonnet with shirred ivory silk lining and matching reticule.

Miniature striped cotton walking dress with matching tall bonnet and reticule.

Miniature striped cotton walking dress with matching tall bonnet and reticule.

Something for the Maid. A much plainer miniature cotton house dress and apron along with a little mop cap.

Something for the Maid. A much plainer miniature cotton house dress and apron along with a little mop cap.

18th Century Marie Antoinette style gown modelled by 16 inch Tyler Wentworth. Made in pure silk.

18th Century Marie Antoinette style gown modelled by 16 inch Tyler Wentworth. Made in pure silk.

Miniature Dita Von Teese style gown and hat. one twelfth style.

Miniature Dita Von Teese style gown and hat. one twelfth style.

 Valentine Ball gown for 16 inch fashion doll.

Valentine Ball gown for 16 inch fashion doll.

Miniature Faerie of Spring and New Life.

Miniature Faerie of Spring and New Life.

Miniature Princess Grace wedding gown on mannequin.

Miniature Princess Grace wedding gown on mannequin.

The miniature Elizabeth Bennett Regency wedding bonnet.

The miniature Elizabeth Bennett Regency wedding bonnet.

Front view of the miniature Fairy Harp. The harp stood about six and a half inches tall.

Front view of the miniature Fairy Harp. The harp stood about six and a half inches tall.

Miniature Young King Henry VIII and Katherine of Aragon.

Miniature Young King Henry VIII and Katherine of Aragon.

Miniature Queen Jane Seymour.

Miniature Queen Jane Seymour.

 Miniature King Richard III with his wife Queen Anne Neville.

Miniature King Richard III with his wife Queen Anne Neville.

Miniature King John and his wife Queen Isabella.

Miniature King John and his wife Queen Isabella.

Miniature Elizabeth 1st doll complete in room setting.

Miniature Elizabeth 1st doll complete in room setting.

Miniature Scrooge.

Miniature Scrooge.

Miniature Ross and Demelza Poldark.

Miniature Ross and Demelza Poldark.

Miniature tricorn hat.

Miniature tricorn hat.

Miniature Anne Boleyn and Thomas Cranmer.

Miniature Anne Boleyn and Thomas Cranmer.

Battle of Flodden (c 1513) Scottish Pikeman outfit for action figue (around 12 inches tall).

Battle of Flodden (c 1513) Scottish Pikeman outfit for action figue (around 12 inches tall).

Coronation robes for 17 inch male fashion doll.

Coronation robes for 17 inch male fashion doll.

Victorian underwear for 16 inch fashion doll.

Victorian underwear for 16 inch fashion doll.

'Romanza' ballet costume for 16 inch ballerina doll.

‘Romanza’ ballet costume for 16 inch ballerina doll.

French (Breton) costume for 16 inch doll.

French (Breton) costume for 16 inch doll.

Alice in Wonderland costume for 12 inch fashion doll.

Alice in Wonderland costume for 12 inch fashion doll.

Miniature Lord Byron Albanian costume.

Miniature Lord Byron Albanian costume.

Miniature Lord Byron Regency tail coat outfit.

Miniature Lord Byron Regency tail coat outfit.

And last but not least:

Medieval style Autumn costume for 16 inch fashion doll.

Medieval style Autumn costume for 16 inch fashion doll.

Miniature Queen Mary 1st (Mary Tudor).

Miniature Queen Mary 1st (Mary Tudor).

I hope you have enjoyed my selection…just a few of the many favourites I have created over the last few years. All of them have given me enormous pleasure and taught me such valuable skills and patience.


Magna Carta, Lampreys and a Child Bride.

THE MAKING OF KING JOHN.

King John of England.

King John of England.

With the 8ooth anniversary of the signing of Magna Carta this month (June 2015) it was only natural that I would be drawn to creating a King John miniature doll.

I have to admit that I didn’t really know much about this king, only that he was the brother of King Richard 1st (The Lion Heart), wasn’t very popular with his people because of the high taxes he levied on them and was part of the legend of Robin Hood. I didn’t even know he was the son of Queen Eleanor of Aquitaine.

So, in order to make a doll of him I started where I always start best….. I looked in my costume books for an idea of what he might have been wearing in 1215. Next I needed to know which doll would be best to use and so I found the picture of his tomb effigy. These were often a very good likeness of the person concerned.

King John's tomb at Worcester Catherdral and Queen Isabella's tomb at Fonterault.

King John’s tomb at Worcester Catherdral and Queen Isabella’s tomb at Fonterault.

Choosing fabrics was the next step so a quick check in the costume books again and away I went for a good rummage in my material stash (no mean feat!).

Fabrics chosen for King John.

Fabrics chosen for King John.

I don’t often get a chance to work on these early Medieval costumes so I was actually very excited. I particularly like Medieval costume although ALL costume is a joy to me.

With miniature dolls, one has to give an impression of most of the under clothing so some aspects of John’s costume look a little odd on their own.

First to be made were his pale green silk jersey stockings and a covering to hide the join between the end of his porcelain legs and the start of the padded wires of the upper legs. I feel this is absolutely necessary on most miniature dolls because people will ALWAYS (oh yes they do!) always turn the doll upside down to see what it has on underneath.  I like everything to be nice and tidy underneath. Next were his tan coloured leather pointed toe shoes, very fashionable at that time.

Stockings, garters and a covering for the top of the legs for modesty and tidyness!

Stockings, garters and a covering for the top of the legs for modesty and tidiness!

Leather pointed toed shoes.

Leather pointed toed shoes.

Then I made his under-tunic which, in order to avoid as much bulk as possible was made in three separate parts: the skirt, the top of the neck area and the lower sleeves. I chose a very fine dark blue silk for this.

False under garments in place.

False under garments in place.

Once these were in place, his top tunic could be dressed onto him. For this I used a beautiful fine gold patterned silk jacquard and trimmed it with a very tiny burgundy ‘fairy lace’ braid.

The sword was actually made from a curved sword that I straightened, painted the top and bound it in a leather ‘sheath’. Once the sword was secured in place I added a deep olive green leather belt with a fancy gold buckle.

The sword was originally curved like this one.

The sword was originally curved like this one.

Sword and belt detail.

Sword and belt detail.

For John’s cloak I chose a deep red wine coloured silk lined with a finer silk of a similar colour. This was fixed to his shoulders with a tiny leather strap and two jewelled filigree ‘brooches’. His crown is simply a gold braid band with the addition of gold filigrees and coloured crystals. Just for fun I fixed a rolled up scroll of parchment paper tied with a red ribbon into his hand………this may or may not signify the Magna Carta……I’ll leave that up to you to decide!

Crown and cloak detail.

Crown and cloak detail.

THE MAKING OF QUEEN ISABELLA.

So once King John was finished, well I couldn’t possibly leave him on his own now, could I? Of course not, so history books (and the internet) were consulted to see who his wife was. This was quite a surprise because I didn’t know he was married twice. The first wife before he became King, was Isabella of Gloucester, but it seems that once he became King he decided that he preferred somebody else and had the marriage annulled on the grounds that she was too closely related to him.

Strangely (said with tongue in cheek) he then married a much younger lady. He married another Isabella (handy!) a very young French maiden from Angouleme. This second wife was just 12 years old when they married in 1200 and apparently he was absolutely besotted with her and remained so until he died. Even more strange (but then maybe not!) was that the first Isabella remained living in her own apartments in the royal residence…..must have led to some rather awkward moments between the two women over the years!

So my next job was to see what a young woman in her twenties might be wearing in 1215 and have another rummage in my fabric stash.

As with her husband, I started with her silk stockings, some cotton drawers (yeah, yeah….I know they didn’t wear any then…. but read my previous blog post on Queen Anne Neville to see why) and some pointed toed slippers in fine leather. As with King John, only the skirt part of the under-gown is made, to avoid unnecessary bulk. I chose a gold silk for this.

Isabella's leather slippers.

Isabella’s leather slippers.

Isabella’s over-gown is made in a fine richly patterned deep red silk jacquard, trimmed with  red and gold patterned silk brocade at the neck, cuffs and hem, edged with flat gold braid. Like john, she has a leather belt around her waist with a fancy gold filigree buckle and the end of the belt hanging down. Around her shoulders is a floor length trained cloak in deep green silk lined with brown silk lining. The cloak is fixed like John’s, with a tiny leather strap and two fancy gold filigree ‘brooches’.

Queen Isabella.

Queen Isabella.

At this time, it was no longer as fashionable to have the hair on show as it had been back in the early 1200’s. By 1215 the hair was covered, along with the neck with a piece of fabric known as a wimple. On top of this was a circular veil held in place with either a band, or in the case of Queen Isabella, a crown. My Isabella’s crown is made from lace painted with metallic gold paint and decorated with tiny crystals.

Wimple, veil and crown detail.

Wimple, veil and crown detail.

Below are some pictures of my King John and Queen Isabella taken in a suitable room box scene along with some miniature food made especially for them by Mary Thornton Medieval Morsels. Mary makes the most accurate miniature food I have seen and she made a dish of lampreys and a lamprey pie (King John’s favourite food) for me. The miniature lampreys look wonderfully revolting (no offence meant to any lamprey lovers out there!).

King John is calling for his wife Queen Isabella. 'Isabella my love, come and see what we are having for dinner tonight.'

King John is calling for his wife Queen Isabella.
‘Isabella my love, come and see what we are having for dinner tonight.’

Queen Isabella looks at the two dishes: 'John mon cher, what on ers are zoze? Zay look 'orrible!'

Queen Isabella looks at the two dishes:
‘John mon cher, what on ers are zoze? Zay look ‘orrible!’

King John tries to explain: 'They are lampreys my love.... my favourite food.'

King John tries to explain:
‘They are lampreys my love…. my favourite food.’

But Isabella is not impressed and rushes out. 'My muzzer told me about zee awful Eenglish food.....and she was right!'

But Isabella is not impressed and rushes out.
‘My muzzer told me about zee awful Eenglish food…..and she was right!’

Later at dinner a relaxed King John is looking forward to his lampreys and tries to persuade Isabella to try some. 'Honestly my darling, they are lovely.'

Later at dinner a relaxed King John is looking forward to his lampreys and tries to persuade Isabella to try some.
‘Honestly my darling, they are lovely.’

But the Queen is not convinced: 'Mais non, mon cher....I sink I weel just 'ave a bit of zee pastry...zoze sings look all slimy!'

But the Queen is not convinced:
‘Mais non, mon cher….I sink I weel just ‘ave a bit of zee pastry…zoze sings look all slimy!’

If you are in need of some miniature food for your dollshouse, it is worth taking a look at Mary’s work. She also has a blog about King John and the lampreys that can be found here.

I hope you have enjoyed reading my blog about the making of my King John and Queen Isabella miniature dolls. Both dolls are for sale. Please contact me if you are interested in purchasing them.

KING JOHN & QUEEN ISABELLA IN SCENE 1

CELEBRATING THE 5OOTH ANNIVERSARY OF HAMPTON COURT PALACE.

The fantastic Tudor entrance at Hampton Court Palace.

The fantastic Tudor entrance at Hampton Court Palace.

This year sees the 5ooth anniversary of Hampton Court Palace in Surrey, United Kingdom. This palace has been home to several kings and queens over the centuries but, perhaps the most famous resident (or maybe that should read ‘infamous’) was King Henry VIII.

King Henry VIII in all his finery.

King Henry VIII in all his finery.

Since this beautiful palace is only about ten minutes drive from where I live and the Tudor period is one of my favourite eras, I was delighted to be asked by Dollshouse and Miniature Scene Magazine (DHMS) to provide three miniature doll-dressing ‘How To’ projects for them.

Of course King Henry himself was an obvious choice and an absolute must for one of the projects, but which of his six wives to choose for the other two? Well, I decided that the most well known had to be Anne Boleyn, Henry’s second wife and the first to lose her head! She would provide a good project for the most typical of Tudor ladies fashions.

One of the most well-known pictures of Anne Boleyn.

One of the most well-known pictures of Anne Boleyn.

For the third project I decided that in order to give a good but manageable alternative Tudor female costume, Henry’s last wife, Catherine Parr, would be a good choice. Subtle changes in fashion over the few years between this lady and Anne Boleyn would make for an interesting project for DHMS readers to try.

Catherine Parr wearing a different style of  costume to that of Anne Boleyn.

Catherine Parr wearing a different style of costume to that of Anne Boleyn.

When I write ‘How To ‘ projects, I have to make the process of dressing a miniature doll accessible to as many people who want to try doll dressing as possible. This caused me a few problems when I was asked for a Henry VIII project. The typical Henry VIII as per the picture at the top of the page is actually quite an advanced costume to make….especially in miniature. Below are some pictures of my top-of-the-range and recently revised Henry VIII miniature doll.

My recently updated version of King Henry VIII

My recently updated version of King Henry VIII

Close up of my recently updated King Henry VIII's  costume detail.

Close up of my recently updated King Henry VIII’s costume detail.

So, after a lot of thinking I put together a set of patterns and instructions and created the following version of this magnificent monarch. It is very similar to the more advanced version but much easier for readers to make and there is scope for the more confident and experienced reader to embellish the doll further if they wish to.

The Henry VIII doll made for the DHMS 'How to Dress' project.

The Henry VIII doll made for the DHMS ‘How to Dress’ project.

A similar problem arose with Anne Boleyn, but again, with some thought, the right look was achieved. Regarding the colour scheme for this doll, since most people associate the song ‘Greensleeves’ with this lady, I decided to dress her in green. The gold letter ‘B’ was created by painting straight onto the doll and then forming the rest of the choker with tiny individually applied faux pearls and crystals.

One of my more advanced Anne Boleyn dolls.

One of my more advanced Anne Boleyn dolls.

The Anne Boleyn doll made for DHMS 'How to Dress' project.

The Anne Boleyn doll made for DHMS ‘How to Dress’ project.

Close up of jewellery detail on DHMS Anne Boleyn doll.

Close up of jewellery detail on DHMS Anne Boleyn doll.

I chose a slightly different dress design and colour for Catherine Parr, than the one in the original painting but stayed with the same headdress. Again, this is an attainable design for readers to make, with scope to embellish as richly as they would like to. All her jewellery plus the edging on her cap is made up of individually applied crystals, tiny filligrees and faux pearls.

Catherine Parr doll made for the DHMS 'How to Dress' project.

Catherine Parr doll made for the DHMS ‘How to Dress’ project.

Close up of the headdress on the DHMS Catherine Parr doll.

Close up of the headdress on the DHMS Catherine Parr doll.

All three of these projects are due to be published in DHMS magazine this coming spring, starting with King Henry. Follow me on Twitter for updates.

If you enjoyed reading this post,  you might like to see some of my previous blog posts about Henry and his wives:

Young King Henry VIII

The young Henry VIII. The eighteen year old fashionable dandy of his time.

The young Henry VIII. The eighteen year old fashionable dandy of his time.

Young Katherine of Aragon

Young Katherine of Aragon, dressed circa 1509/10.

Young Katherine of Aragon, dressed circa 1509/10.

Jane Seymour

Jane Seymour, third wife of King Henry VIII and mother to his only legitimate son Edward.

Jane Seymour, third wife of King Henry VIII and mother to his only legitimate son Edward.

The Making of Queen Jane.

My new Queen Jane Seymour miniature doll.

Hello! As some of you might know, I have been gradually re-designing all the miniature dolls in my Henry VIII collection. I have also introduced two new dolls into this collection in the form of Young Henry VIII and Young Katherine of Aragon. Introduing new dolls or re-designing existing dolls can be a very slow process, as it has to be fitted around my every day doll orders and my order book is always very busy.

However, recently I was delighted to be given the chance to redesign Henry’s third wife, Jane Seymour, as an order. This was a wonderful chance to work on a character doll that tends to be far less popular than some of Henry’s other wives (such as Anne Boleyn for example!) 

My original miniature Jane Seymour doll.

When redesigning an existing character doll like Jane I had to take into consideration how close to my original doll she needed to look to be identifiable alongside the other wives. I needed to see how much I could improve her over-all look, how acurate I was able to make her costume with the skills I have improved over the years and also to make sure that she was still attractive as a doll. 

First of all, I wanted to make sure that I kept as close to the original colour scheme as I could, because in my mind, this was part of the doll’s identity. The original doll I made several years ago was based on a painting of the real Jane Seymour (below) and at the time, I decided to soften the main colour of the gown to make the doll less dark and more appealing as a doll.

Painting of Jane Seymour by Holbein.

Chosen fabrics and trims for Jane's dress.

As with the first version I made, I chose a doll with a pretty face. Many of the paintings of Henry’s wives are not the modern day idea of pretty or attractive. With a doll however, it is most important to have a face that will appeal to collectors……nobody wants to buy an unattractive doll! So I chose a doll with a pretty face and, very importantly for this costume, a lovely long neck to display that complicated head dress!Next was the choice of colour and fabric. The type of fabric was always going to be pure silk…..only the best is good enough for a Queen! With the colour, I decided that I would find a silk that as close as possible to the colour in the painting, without being ‘heavy’ or over-bearing on such a small doll. The use of contrasting fabric and trims would play a large part in the over-all look and success of this costume. In the end, I settled on a lovely two-tone silk in a pretty shade of pale brickdust teamed with and ivory and gold silk brocade, metallic gold net and a mixture of black and gold braids. 

Patterns and costume parts cut ready to make up.

Jane with underwear and totally armless!

Close up of Jane's leather slippers.

Once the underwear and shoes were on, I could move on to the skirt, false centre panel and bodice. At this stage, I had already constructed all the parts of the main costume and trimmed as much as I could.
You may have noticed that Jane has no arms at this stage. Sometimes with a miniature doll, the arms get in the way and it is easier to add them later.  As some of you may know, the costume of the miniature doll (as opposed to a larger scale doll) is often full of illusions. On such a small doll it is of great importance to avoid as much bulk as possible in order to keep the line of the costume smooth, without lumps and bumps! So, first of all I secured a narrow frill of lace around Jane’s neckline. This would eventually give the illusion that she was wearing a lace-triimed shift underneath the gown as a real Tudor lady would. Once the lace was secure, the centre panel was secured into place, followed by the main skirt and then the bodice fitted and stitched into place. Front and back plackets were secured to the bodice front and back to give an authentic Tudor look.

Jane with skirts, bodice and lace frill.

 Next came the intricate sleeves after giving Jane her arms at last! Lace cuffs were added to the doll’s wrists. These would look like the the frills from her (imaginary) shift.  Then the gown sleeves were added in three parts: the upper main sleeve, the lower main sleeve and the fancy false under sleeve. The lower main sleeves were lined with gold net and folded back to reveal the padded gold silk brocade false under sleeves with their mock slashing edge. Here is Jane with arms and sleeves:

Jane, almost fully dressed and no longer armless.

The next stage was to add her necklace and head dress. The necklace was made up of tiny faux pearls, filigrees and crystals, each individually applied. This is a very time-consuming (but enjoyable) job and requires much patience and precision to make sure each tiny item ends up in exactly the right place. Once the necklace was completely set, I could move on to the head dress.

Close up of Jane's necklace and jewelled billiments on the coif.

Jane wears a short English Gable Coif with pinned up lappets and split veil, pinned up on one side. The English Gable Coif was originally seen at the end of the 1400’s with the lappets worn down and a full veil at the back. It gradually became shorter until it eventually went out of fashion in favour of the smaller crescent shaped French Hood. Below is a  picture showing its longer form with Henry VIII’s mother Elizabeth of York.

Henry's mother Elizabeth of York.

Below is a picture of Henry’s first wife Katherine of Aragon in middle age wearing a slightly shorter version with the lappets pinned up but still a full veil at the back.

Henry's first wife Katherine of Aragon.

 Below is a picture showing my new Jane’s Gable Coif. The main parts of the head dress was constructed in silk covered card. The lappets were made in silk brocade and secured to the top of the coif where they were then folded back onto the top of the coif and secured in place.


Close up from above showing the gold silk brocade lappets folded on the top of the coif.

Next to be applied were the black silk veils and box back of the coif. The jewelled billaments were secured at the front before one of the veils was  folded onto the top of the coif…….phew! Such a lot of work for such a tiny piece!

Back of the coif showing the two black veils (one folded up onto the top) and the box back.

All that remained was the finishing, first with crystals, filigrees and pearls added to the centre front of the gown to form the jewelled belt.

Close up of the jewelled hanging belt.


Further decoration was then added to the mock slashing on the false under sleeves plus rings were added to Jane’s fingers.

Detail of false under sleeves and rings on Jane's fingers.

Once everything was in place the last thing to do was to drape the front skirt and the back skirt train to make them look more realistic.

Back view of the costume.

Jane Seymour was finally finished and ready to go to her new home. This was a hugely enjoyable project even though it took a long time but miniature dolls simply cannot be rushed.

Full length side view of Jane.

Until next time.

Best wishes, Louise.

Some Of My Favourite Commissions of 2011 (part one).

Hello Everybody!

Doesn’t time fly? One minute I’m writing about young Henry and Katherine and Christmas is only just on the horizon and then, before I know it, we’re into February!

As some of you know, I write for one of the UK’s leading miniatures magazines ‘Dolls House And Miniature Scene’ (DHMS). I write ‘How To Dress’ miniature dolls articles. For this aspect of my job, I work closely with the editor who commissions me to provide articles on a specific costume theme. I then design and create a doll dressed appropriately for the given theme which will be photographed by the magazine as the finished article, so to speak. I also provide all the pattern pieces needed and the full making up instructions.

As you can imagine, this is no mean task as the doll on its own will take many hours of designing and creating, let alone all the instructions on how to do it!  But I regard this aspect of my work as most important because, for me, it is very satisfying to know that I am sharing my knowledge of this subject with others. It would be so easy to keep it all to oneself but in all honesty, what would that really achieve? Far better surely, to feel the pleasure of sharing.

I have always enjoyed the total doll creation process. But my favourite part has to be the actual costume creation. There is just something about working with fabric and turning it from a flat piece of material into a perfect miniature outfit. It tickles my senses!

My favourite commissions from DHMS last year were the Edwardian dolls based on styles from the popular TV series ‘Downton Abbey’. I was thrilled to be asked to provide articles for a lady and gent in day wear and a lady and gent in evening wear. The late Edwardian period was such an elegant era and, until recently, was nowhere near as popular as it should have been!

Lady and Gentleman in day wear. circa 1914.

 The year I chose was around 1914,  as I was commissioned before the second series began. At this time, ladies clothing was changing rapidly. Gone were the wide, full-legth trailing skirts of the early Edwardian era and the new fashion for slim-line skirts showing shoes and ankles was all the vogue! Bodices were also far more relaxed a less fitted, allowing the wearer much more freedom of movement.

For the lady’s costume, I chose to use a pretty mint green with toning stripe silk as I wanted to portray both youth and those wonderful heady Summer days just before the 1st World War was announced. Here are a few closer pictures of the lady:

1914 Lady on her own.

Close up of her matching shoes and lace stockings.

Close up of the purse.

Close up of the parasol (and lace mittens).

Hat, collar and dragonfly brooch detail.

 This lady’s gentleman friend is equally trendy in his tweed sports suit. Mens’ clothing was also changing to reflect the needs of the more sporty man. Clothing for him had to be comfortable enough to be able to go golfing, shooting or even driving the new motor cars!

The late Edwardian gent showing off his sports suit.

Close up of his real leather, laced shoes.

 Evening wear for gentlemen was still quite formal and hadn’t really changed since Victorian times. A full tail suit was still an absolute must for all formal dining and evening socialising.

Gentleman in full formal evening wear.

Close up of silk waistcoat and jewelled watch chain.

 Ladies evening wear was very elegant and echoed the simple Grecian lines of the Regency era. Skirts were drapy and soft, above ankle and often had tulle or chiffon over-dresses. Hair was dressed softly with fancy combs and feathered brooches and long evening gloves were always worn for formal occaisions.

1914 Lady in evening wear.

Close up of shoes.Close up of jewelled hanging belt.

Hair and necklace close up.
 
This was a wonderful project to work on and to be a part of and I expect you might be wondering what actually happens to the dolls that are created for the ‘How To’s’. Well, thay are kindly returned to me by the editor so that I can find them all new homes. I then put them into my E-bid store. They are all in absolutely pefect  condition but because they have been made for photographic purposes, I often list them at well below their normal retail price.
 
So if you think you would like any of them to come and live in your dolls house or display cabinet, you can see them in my store here.

 Until next time,

Best wishes,

Louise.


I have a BRAND NEW on-line store!!

Hello,

I have just opened a brand new on-line store at E-bid.

At the moment I am working hard to add as many of my in-stock-and-ready-to-send miniature dolls as I can. Several of these dolls are listed at below my normal retail prices and will make excellent Christmas presents for your friends……or why not treat yourself?

I plan to add quite a mix of miniature dolls from ordinary every-day characters to fantasy and fairy folk.

If you would like to see my new store please go to

https://www.ebid.net/uk/stores/Angelique-Miniatures

Be sure to check back often to see all the new dolls that I add over the next couple of weeks!

Hope you enjoy your visit!

ANOTHER BRAND NEW DOLL. YOUNG HENRY VIII: A NEW KING FOR A NEW ERA.


On 21st April 1509 the elderly King Henry VII died and his eighteen year old second son became King Henry VIII of England. Young Henry was taller than the average Tudor man, athletic, creative and handsome with a love of music and a keen interest in the latest fashions; quite a change from his dour, dull and penny-pinching father.

Thus started the reign of a most memorable and famous King who, through his decisions and actions

would determine the course of English history……….the turbulent Henrician era had begun.

The young Henry VIII. The eighteen year old fashionable dandy of his time.

 Having created my Young Katherine of Aragon doll first (see previous post), I wanted to match and tone the colours of Henry’s costume to those used for Katherine. I also wanted to give the feeling of youthfulness and hope which is why I kept the colour scheme light and fresh. It is also true that at this time (1509/10) the dour and dark colours of Henry VII’s reign did briefly go out of fashion for younger people. However, darker colours did return to fashion within the next few years although they were mainly used for accent rather than for a whole outfit.

(After the frugal Court of the elderly King Henry VII, the older courtiers must have had quite a shock when the vivacious new teenage King spent a fortune in brightening the ‘old place’ up for himself and his young, exotic Spanish bride. Henry VIII would become known for his lavish spending! )

In deciding the style of Young Henry’s costume, I designed it using a mixture of styles found in costume reference sources in books and on the internet . I also found the the following portrait of a very young Henry:

Portrait of a very youthful King Henry VIII.

 Henry’s hair style is typical of the very early Tudor era, worn long and straight; very different from the much shorter styles of the mid-Henrician era that we are more familiar with. The hat in this portrait is still quite Medieval in style being round with a turned up brim, decorated with brooches. The robe with its heavy and wide fur collar would continue for many years although in this early period, it is not as padded and large as it would become mid era. Below is a close up picture  of the top half of Young Henry:

Top half of Young Henry showing detail of hat, hair, 'fur' robe collar and jewellery.

 I chose to make a slightly different version of the hat with a more pointed crown but still with the turned up brim. It is difficult to see in this picture but the brim is also notched as was the high fashion of the time. As described in many contemporary descriptions, Henry has the auburn hair that he (and his children) were so famous for, styled loose and shoulder length as described before. You can just see the top of the fine silk shirt with its fancy gold band, over which there is a jewelled gold necklace with diamond shaped peridot pendant. I chose to make the V-necked doublet in pale almond green silk brocade to tone with the colouring on Katherine’s under-gown. The heavy jewelled chain around Henry’s shoulders is made from a metallic gold braid with flat backed pearls and crystals added to each section and joined at the centre front with tiny golden jewelled filigrees. Below is a close up of the lower half of Henry’s costume:

Close up of purse and (nervous cough!) the required codpiece!

 You can see from the picture above that the doublet finishes just below the waist and there is a fancy cord belt tied over it to hold the decorated leather purse. During this early Tudor period, the hosen (leg coverings) were still very Medieval in style and full-length, very much like our modern day tights (panty hose). (Later on the hosen would become more like stockings). During the 1500s it was still very fashionable for younger men to display their shapely legs fully. Although quite a delicate subject nowadays, the codpiece was also very important part of the gentleman’s costume. At this time it consisted of a triangular flap laced to the main part of hosen and was not padded or emphasised as in later fashions. It was merely practical to cover the privates but convenient enough to undo in order to pee.

I used a fine silk jersey fabric for Henry’s hosen and hand-dyed it to tone with the colour scheme used for Katherine. At first I dyed it to match Katherine’s under-gown but felt that the paler colour was too feminine for Henry so I decided to re-dye it a few shades darker. The codpiece caused me quite a lot of trouble regarding trying to make it look right and not ridiculous! Without any form of ‘filling’ in it, it looked wrong and with too much, it looked equally wrong. Having tried tiny amounts of cotton wool and then toy stuffing, I was about to give up when I noticed a little scrap of the silk jersey on the floor that had missed the bin. A few minutes of rolling, scrunching and hand stitching later, Henry’s annoying codpiece was annoying no more! Below is a close up of Henry’s leather shoes:

Close up of Henry's fashionable wide-toed leather shoes.

Once the problems of the hosen were overcome the shoes were quite simple to make. At this time, the slim, more pointed shoes of the Medieval period had given way to a new German-style fashion of very wide-toed shoes. These shoes were very flat and could be worn either with or without a strap across the instep and were often slashed to reveal a different coloured leather through the slashes. The width of the square shaped toes was often highly exagerated and much wider than the foot of the wearer, often being padded out inside………something that would also become popular with the robe and doublet of later times. Below is a close up of the robe and doublet sleeves:

Close up of Henry's slashed doublet sleeve and split hanging robe sleeve.

 I chose to make Henry’s robe from cream silk jacquard as I wanted to emphasise the freshness of youth and also not have him clash with the fabric used for Katherines gown. The length of the robe is fashionably short to just above Henry’s knees and the cream ‘fur’ trim (made from chunky chenille yarn) extends into the typical Tudor fur collar around the shoulders (you can see this better if you scroll back up to the full-length picture at the start of this post). I also added a fancy cream and gold braid for more opulence.

At this time, the sleeves of the robe were often very long (past knee length) and unpadded. If worn long, they were slashed about half way down the length for the wearer to put his arm through comfortably. Henry’s robe sleeves are also lined in a biscuit coloured silk which you can just see in the above picture. Slashing was an extremely popular German fashion and continued to be much favoured for most of the Henrician era. It was often seen on doublet fronts, shoes, sleeves and also in ladies sleeves later in the period too. You can see that Henry’s doublet sleeves are fashionably slashed at the elbows to reveal the silk of his shirt underneath.

Whilst Henry took a very long time to design and complete, I thoroughly enjoyed the challenge of his making. It is with poigniancy though, that I look back over the reign of this most memorable of rulers. For me there are so many ‘what ifs’ about Henry’s life. For example, what if his first son with Katherine had not died in infancy……..would that have made Henry different, I wonder? The start of Henry’s reign and also the start of his first marriage seemed to hold such promise for the future, such triumphs and victories. I have always felt that it was very sad that this particular love story ended so sadly and bitterly.

Henry and Katherine (together again if only in doll form)

 Until next time, bye for now!

A match made in Heaven?.....sadly it was not to be.

Brand New Doll: Young Katherine Of Aragon.

Hello! In between orders, I have been working on the latest doll to add to my Tudor miniature dolls line. Please let me introduce to you my ‘Young Katherine Of Aragon’:

Young Katherine of Aragon, dressed circa 1509/10.

 I have always felt rather sorry for this grand lady, whatever her faults may or may not have been and wanted to be able to portray her in her youth, in happier times. As many of you may well know, Katherine of Aragon was the first wife of the infamous King Henry VIII of England. However, Henry was not her first husband as she had been first married to Henry’s older brother Athur. The match between Katherine and Arthur was arranged by their parents Ferdinand and Isabela of Spain and Henry VII and Elizabeth of England when both were just toddlers. When Arthur reached the age of 14, Katherine, shortly before her 16th birthday, travelled to England for the marriage in 1501. Sadly the young prince died less than six months later, leaving Katherine a widow. Unable to return to Spain, the young teeneager was stuck in England under the protection of her miserly father-in-law Henry VII, who by all accounts, left her barely able to clothe her ladies in waiting, let alone herself.

During those difficult years, Katherine formed a strong friendship with Arthur’s younger brother, the robust and lively Henry and, by the time the old King died in 1509, that friendship had turned to love. The 18 year old Henry, now King Henry VIII of England, married the 23 year old Spanish princess and it is well documented that he was most taken with his young bride. It seems fair to say that the early years of their marriage were very happy with the young King being most attentive and openly romantic towards Katherine.

So, when I created this new doll, I wanted to try and capture the youth, hope and happiness of that early married life. In researching the young Katherine, I came across the fact that, she had pale auburn hair, NOT as I had always assumed for a Spaniard, black or dark hair. I also found this lovely painting of her, painted between 1501 and 1509 by court painter Michel Sittow:

The Young Katherine of Aragon.

 Since this portrait was painted before she married Henry, she is wearing more sombre colours than I have used for the doll. Henry VIII’s Court was very lively and vibrant, like him. Very unlike the dour seriousness of his father’s Court. Therefore I chose a rich gold silk jacquard for her over-gown with a paler, more youthful green for the under-gown, both popular colours for Royalty and the elite at that time. The style is that of around 1509/10, with the Medieval influence still visible alongside the more typical Henrician Tudor style. I have kept the head dress or ‘coif’ similar to the style in the painting and this would more than likely have been black for most married women.

Here is a close-up of the coif, jewellery and gown bodice. The tightly fitted over-gown bodice is open to reveal part of the green under-gown. Around the neckline, you can just see the edge of the lace from the shift she would have worn next to her skin. The lace is gold-edged, (Yep……..I painted that by hand!…….time consuming but worth it). There is also some more gold-edged hand-painted lace around the front of the coif and at her wrists.

Showing the individually applied jewellery, bodice detail and coif.

 The long hanging sleeves of the overgown are lined with a rich brocade of cream and gold. These long sleeves were typical of the late Medieval and early Tudor era and eventually developed into the wider, turned back sleeves of the middle Tudor period. 

Close up of the over sleeve lining detail.

 At this stage the sleeves of the under-gown were still tightly fitted but these developed into the large padded and fancy false under-sleeves more commonly associated with Tudor costume.

Close up of the end of the tight-fitting under-sleeve, also showing the gold edged lace cuff from the shift.

During the early 1500’s, ladies could wear either a tied belt around their waists or the more elaborate jewelled hanging belt. Since Katherine’s gown is rather an elaborate Court gown, I felt it looked better with the more formal hanging belt. The pearls and crystals were all individually applied to fancy black and gold braid with the addition of jewelled gold filigrees at the waist and at the end of the belt.

Close up of the jewelled hanging belt.

 I thoroughly enjoyed designing and creating this new doll and she is proving very popular, with collectors placing orders for her already. Of course I shall now have to work on a young Henry VIII to accompany her but for now it is only right that she has the centre stage and spotlight all to herself.

Until next time, bye for now!

Summer Solstice Is The Time To See All Things Fairy.

The Fairy Harpist miniature doll with hand customised fairy harp.

Hello everybody!

Each year around the 21st June is the Summer Solstice, the longest day of the year when the sun is nearest to the earth, here in the Northern Hemisphere. It is supposed to be the true start of Summer…..although with all the rain and lower temperatures than April here in the United Kingdom, I am begining to think that Summer has been and gone earlier this year!

The Summer Solstice is also supposed to be a very magical time  according to ancient legend and folklore. On this day at dawn or at dusk, if you are very lucky……you may just be lucky enough to see……….wait for it……….fairies! It is said that at these special times the veil between the world of humans and the world of The Fae  is very thin and you may just be able to glimse them dancing and celebrating, for fairies love to party. And if you see any fairies that need some shoes, please tell them that they can buy some from me in any colour they would like!

Miniature Fairy Slippers, just an inch long. Made in silk, with cotton lining and little leather soles. Shown with an English penny and a US five cent piece.

But just in case you don’t get to see any of them this year, I thought I would share some pictures of some of my own fairies with you instead. But before I do, you may remember a certain little Baby Fairy who donated herself as a prize in my competition in May. Baby Fairy is now enjoying a life of leisure in Wales and if you would like to hear all about her new home and new friends, let me know and I’ll see what I can do……….I’m sure she would be thoroughly delighted to tell you all about it!

I have loved all things FAIRY for as long as I can remember and I really love making them as miniature dolls. Below are some of my favourites made over the last few years.

I once came across a gorgeous artificial rose stem that leant itself perfectly to a mother and baby fairy snoozing together. The baby didn’t need any clothing so she had some tiny dried flowers and greenery in her hair instead. The mother I dressed in little chiffon petals.  The mother fairy just about fitted onto the lower, larger rose while the baby fitted easily into the small bloom:

Mother and baby fairy sleep soundly on separate flowers in 'Rose Dreams'.

 One of my favourite and most recent fairies was ‘The Fairy Flower Seller’, detailed in a previous post. This one took a very long time to make with all the tiny flowers to secure in place but was a very enjoyable project. I chose lavender over pale pink silk for this fairy and dyed the flowers to go with these colours. 

The Fairy Flower Seller with her pet unicorn who carries all the flowers for her.

 One of my most popular fairy ensembles has to be ‘Holding Court’, a miniature Fairy Queen with floral crown, sitting on a golden flower-decked throne. For this fairy I chose a shot (two tone) silk sold as ‘Blackberry’, quite a bold and dark purply pink with black cross weave. To contrast, the under-gown was made in pale pink silk with metalic gold fancy braid and gold criss-cross on the bodice. Again, all the flowers were hand-dyed to match and tone.

'Holding Court' miniature fairy ensemble.

 The throne origianally started as a plain stained wood, high-backed chair. It was hand crafted and bought on an online auction. I customised it by painting it with gold paint and glitter and then decorated it with filigrees, crystals and tiny hand-dyed dried flowers. I then added a little silk cushion (to match the fairy’s dress) with fancy braid and tassels. Here is a picture of the throne on its own:

The 'Holding Court' customised throne.

You may have noticed the ‘Fairy Harpist’ at the top of this page. She came about mainly because of some favourite music on a cd that I love to listen to when I am designing and creating my fairy folk. This is a cd of the beautiful (in my opinion) Victorian harp music, recorded by an equally beautiful harpist, Elizabeth Jane Baldry. The cd is called ‘Harp of Wild and Dreamlike Strain’ and is a collection of fairy-themed Victorian music never before recorded until Elizabeth Jane recorded it in the 1990’s. I believe it is still available and can be obtained from Elizabeth Jane’s web site (see link in blogroll or at the end of this post).

I chose the colours of bluebells for the Fairy Harpist’s gown as it was bluebell time when I created the first doll. Here are some other pictures of her silk dress:

Side view of the miniature Fairy Harpist.

Back view of the Fairy Harpist's gown.

I already had a miniature harp in my dollshouse so this was quickly ‘borrowed’ and customised with gold glittery paint, golden ribbon, filigrees, crystals and tiny dried flowers to match the Fairy Harpist. It took a long time to carefully secure all those flowers into the right places but was worth the time and effort.

Front view of the miniature Fairy Harp. The harp stood about six and a half inches tall.Back view of the miniature Fairy Harp.

 Well that is all for now, but if you have enjoyed this post please leave me a little message as I would love to hear from you.

If you would like to see Elizabeth Jane’s web site please click here.

If you like miniatures please do take a look at the latest AIM (Artisans in Miniature) online free magazine here.